1. Introduction
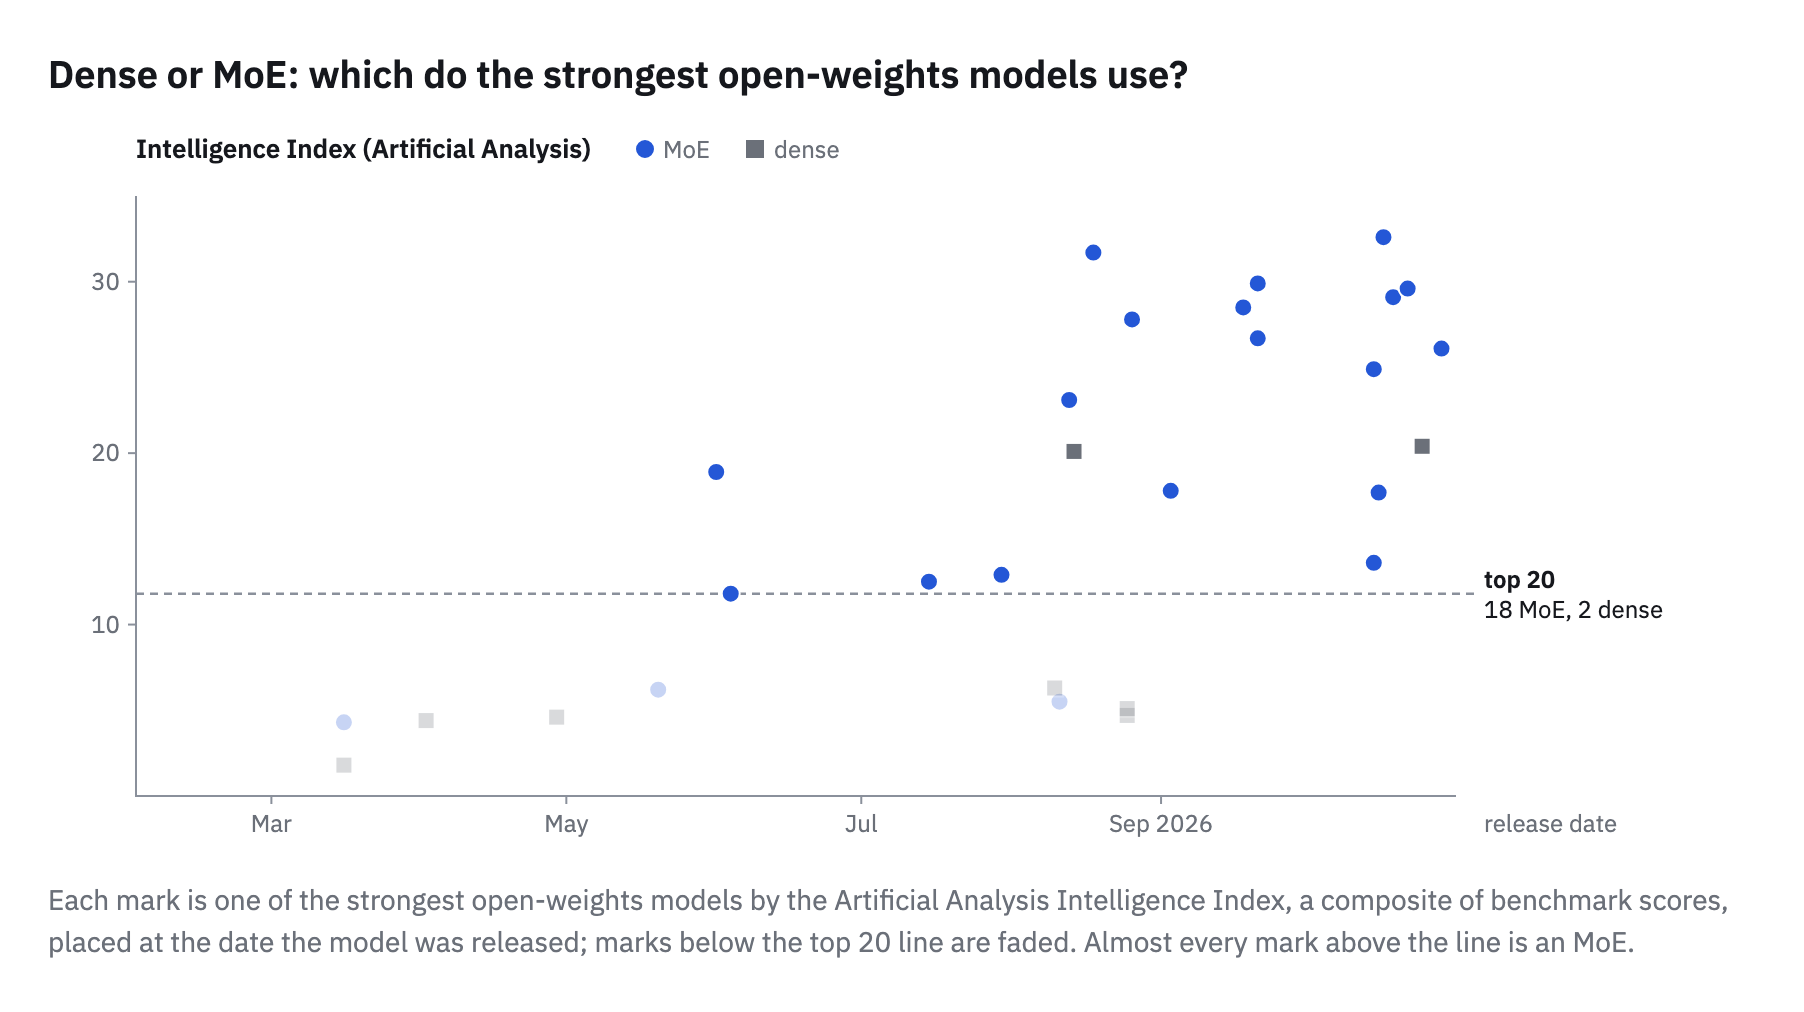 Figure 1.1
Dense or MoE: which do the strongest open-weights models use?
 Figure 1.2
Triage flowchart
 Figure 1.3
Each chapter, and what it leaves you with
2. Setup and your first run
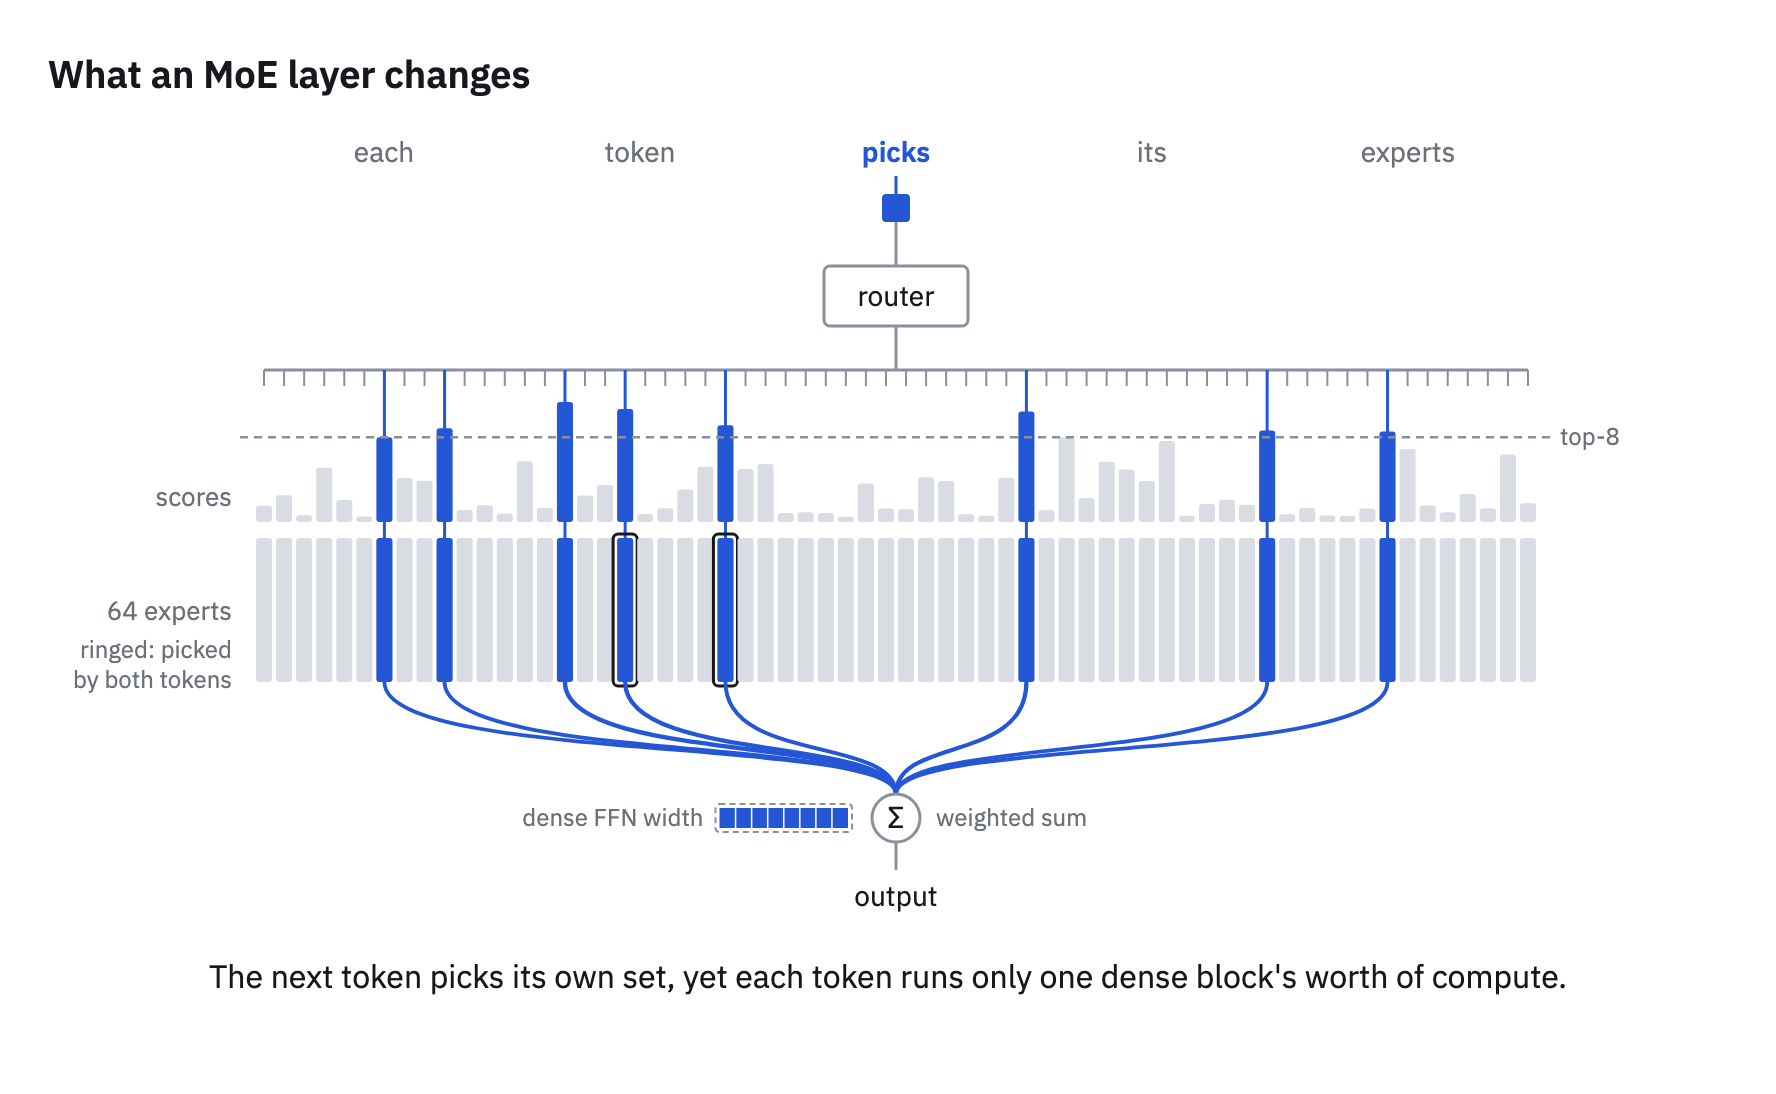 Figure 2.5.1
Your first MoE
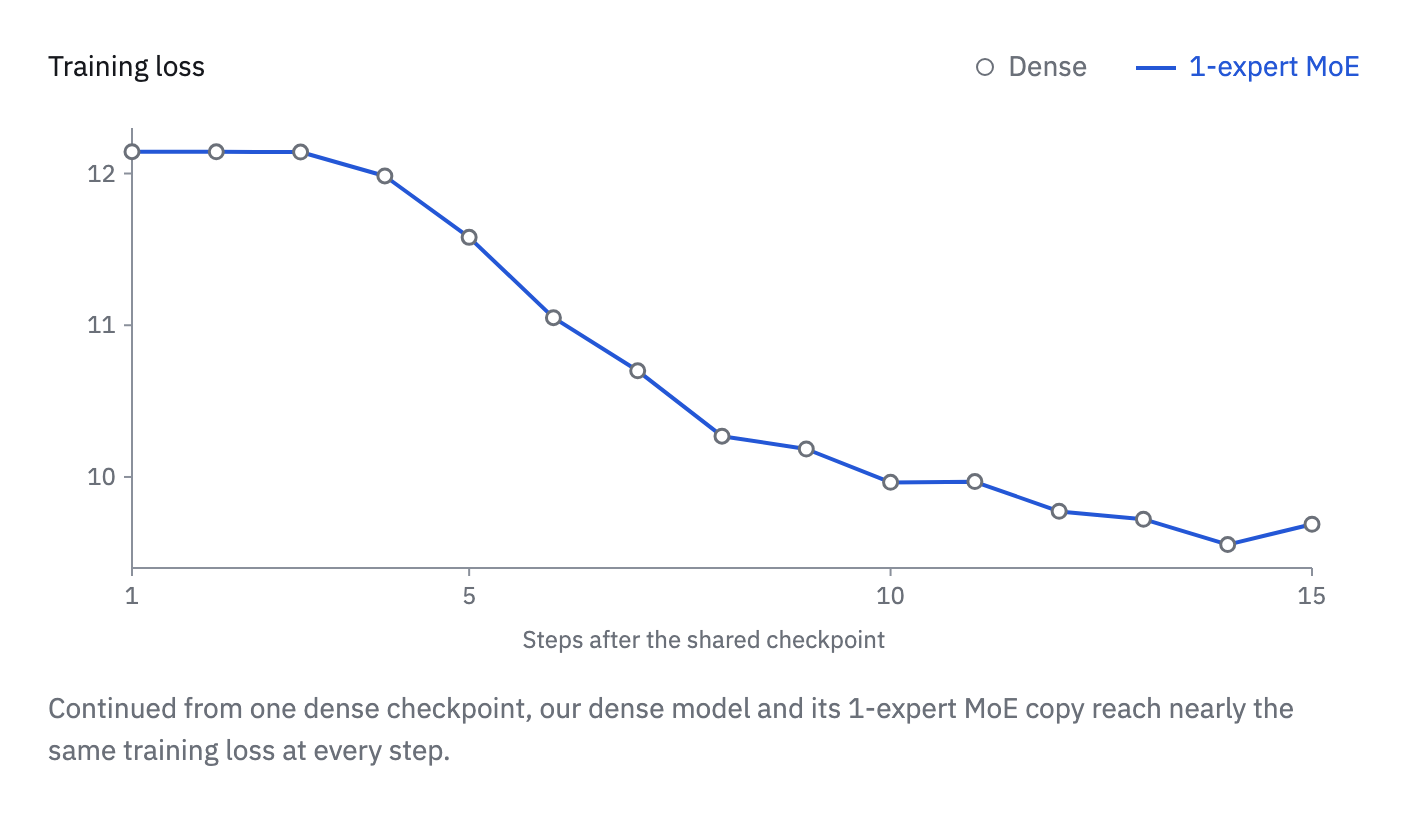 Figure 2.5.3
Keep a dense reference
3. Anatomy of MoE Training
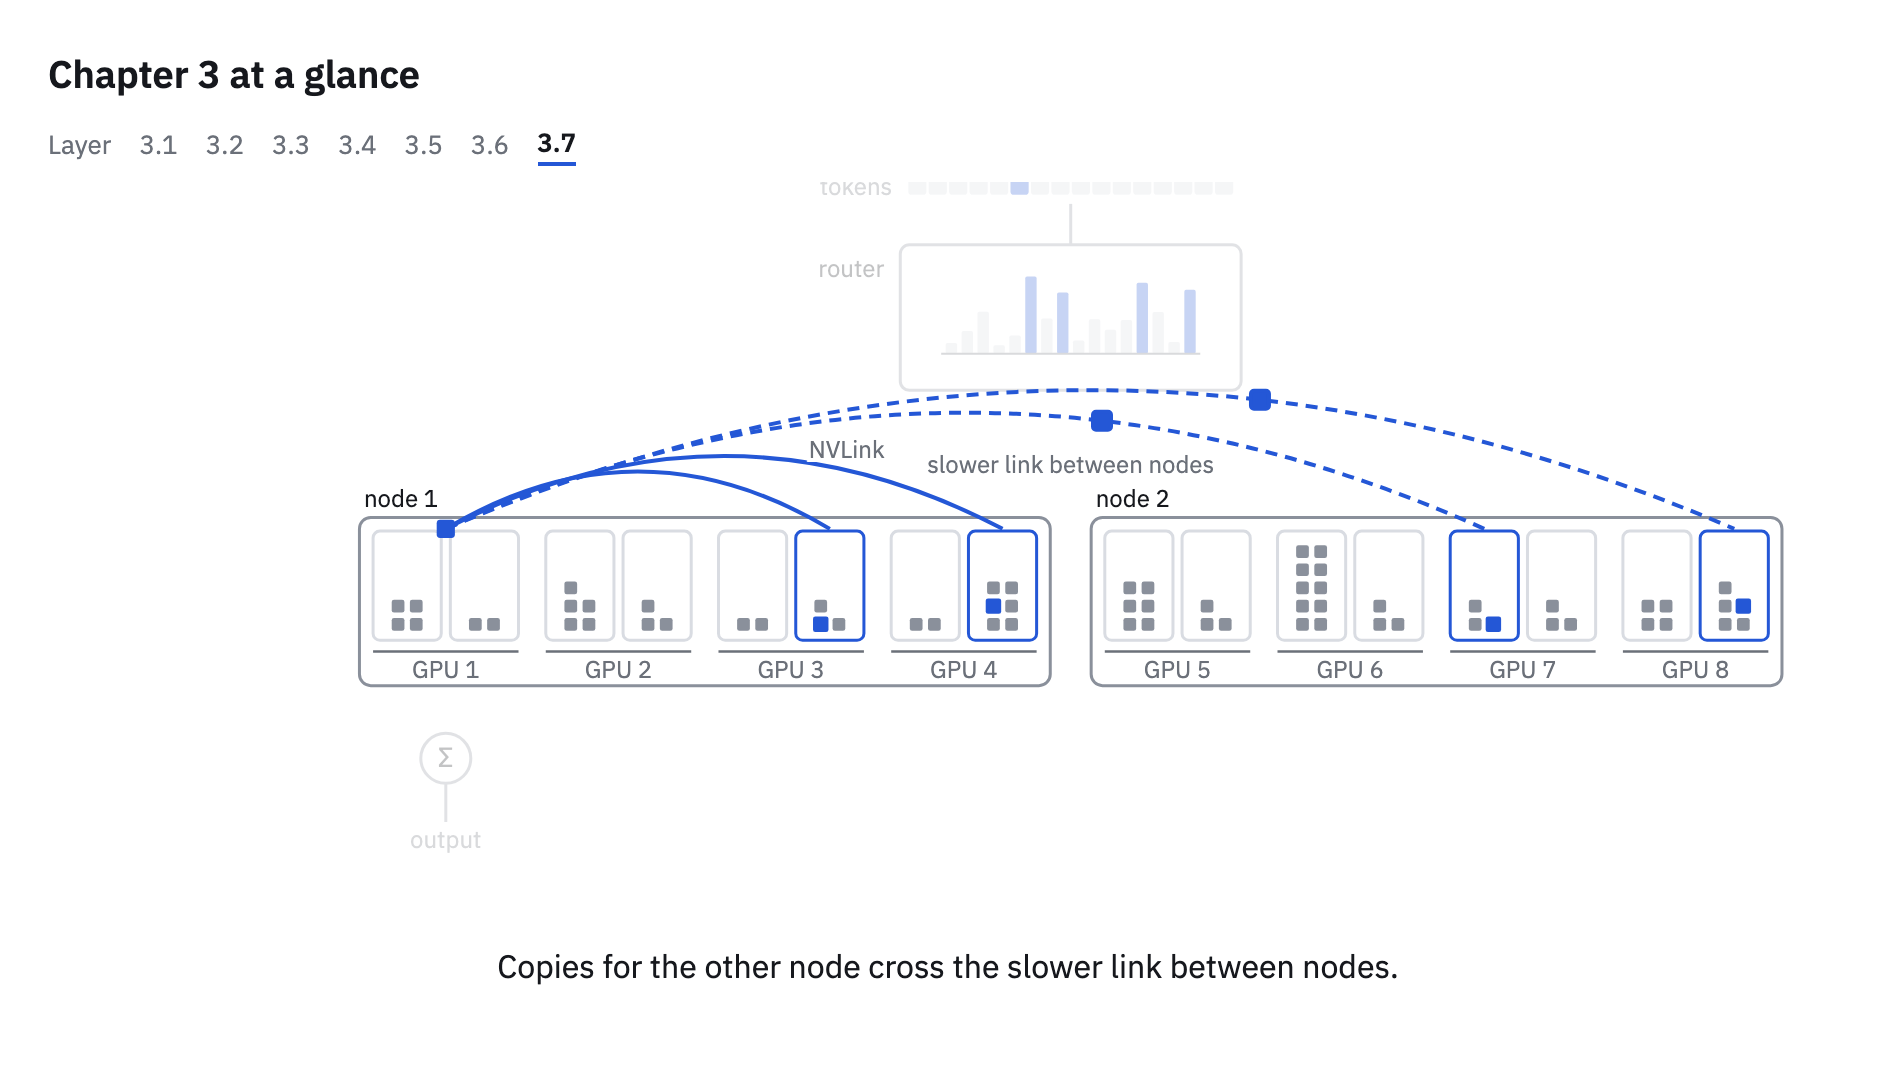 Figure 3
Chapter 3 at a glance
3.1 Router scoring
 Figure 3.1.1
Gating function
 Figure 3.1.2
Output scale
 Figure 3.1.3
Sharpness
 Figure 3.1.4
Precision
3.2 Routing strategy
 Figure 3.2.1
Who selects
 Figure 3.2.2
Hash layers
3.3 Load balancing
 Figure 3.3.1
Cost of imbalance
 Figure 3.3.2
Cost of imbalance
 Figure 3.3.3
Aux loss
 Figure 3.3.4
Aux loss
 Figure 3.3.5
Scope
 Figure 3.3.6
Loss-free bias
 Figure 3.3.7
Loss-free bias
 Figure 3.3.8
Loss-free bias
 Figure 3.3.9
Loss-free bias
 Figure 3.3.10
Loss-free bias
 Figure 3.3.11
Quantile
 Figure 3.3.12
Quantile
3.4 Experts
 Figure 3.4.1
Count and size
 Figure 3.4.2
Count and size
 Figure 3.4.3
Count and size
 Figure 3.4.4
Latent MoE
 Figure 3.4.5
Shared experts
 Figure 3.4.6
Variable compute
 Figure 3.4.7
Activation
 Figure 3.4.8
Activation
3.5 Block layout
 Figure 3.5.1
Dense layers
 Figure 3.5.2
Block wiring
3.6 Training
 Figure 3.6.1
Upcycling
 Figure 3.6.2
Upcycling
 Figure 3.6.3
Optimizer
 Figure 3.6.4
MTP
 Figure 3.6.5
Stability
3.7 Systems
 Figure 3.7.1
Profiling
 Figure 3.7.2
Profiling
 Figure 3.7.3
Interconnect
 Figure 3.7.4
Interconnect
 Figure 3.7.5
Overlap
 Figure 3.7.6
Memory
 Figure 3.7.7
Memory
 Figure 3.7.8
Group-limited routing
 Figure 3.7.9
Group-limited routing
 Figure 3.7.10
Capacity and replicas
 Figure 3.7.11
Precision
4. From training to serving
 Figure 4.1
Serving a different k
 Figure 4.2
Low-bit experts
 Figure 4.3
Expert parallelism at serving
 Figure 4.4
Attention-FFN disaggregation
 Figure 4.5